
Over time, bathroom fixtures—such as faucets, showerheads, handles, and even…
Repairing a ball valve in a faucet
 Most faucets use a single-handle design with a cartridge insert that is very similar to the one used by many other brands. This is an older faucet design that has largely been replaced by more modern cartridge faucets, but many of these older faucets are still in use. The repair steps shown here will also work for several other brands of ball valves, as well as shower faucets that use the same design.
The most common faucet repair parts involve replacing the valve seats and springs. If replacing the seats and springs does not fix the leak, the next step is to replace the cartridge itself. However, it is always better to start with the cheapest and easiest repair first.
Step 1
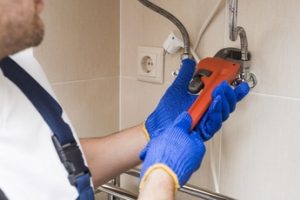
Close the water supply to the faucet by closing the hot and cold water shut-off valve under the sink. Make sure the water is turned off by turning the faucet all the way on; no water should come out. Loosen the set screw that secures the handle with an Allen wrench. Pull the handle straight up to remove it. Normally, it is not necessary to completely remove the set screw to remove the handle.
Step 2
Remove the retaining nut on the top of the faucet body with needle nose pliers. The nut may be stuck if the faucet has not been disassembled in years. Place the pliers on the knurled ring of the nut to get a good grip and not damage the nut. If the nut is stuck, apply some spray lubricant to the nut and let it sit for a few minutes before trying again. Tip: Tape the jaws of the pliers so they don’t scratch the surface of the faucet.
Step 3
Note the orientation of the cartridge in the faucet body; you will reinstall it in the same position. Lift the cartridge out of the faucet body. If you cannot pull it out by hand, use a screwdriver on each side of the cartridge to wedge it out. On the left side of the cartridge, jam a small flathead screwdriver under the tab that sticks out to the side. On the right side, you may need a thin screwdriver to fit between the cartridge and the valve body. You should be able to pull the cartridge straight out once it is loosened.
Step 4
Note the alignment of the rubber seats in the holes in the bottom of the faucet housing. The new seats must be inserted the same way to create a seal. There is a small spring and white insert under each seat. Carefully remove the seats, springs and inserts with a small screwdriver.
Step 5
Install the new valve seats and springs just as you did the old ones. The plastic insert goes in the bottom of the spring, and the rubber seat goes in the top. The parts are interchangeable, so both seats/springs from the set will fit in both holes. Slide the three parts onto a screwdriver to hold them in place while you insert them into the hole in the faucet body. Push them in all the way with your finger. They should stick up a little, but spring down when you press on them.
The Emergency Plumber in Worcester is your right contact partner. When plumbing issues occur in your house, then it’s better to call professionals. Our Customer Service is 24 hours available. Never hesitate to make us a call, 01905959004.